eSIM setup guide
How to install an eSIM
Install your Maaltalk eSIM on Wi-Fi on the day you travel — in one tap with the MaaltalkNow app, by scanning the QR code from your order email, or by entering the code manually. When you land, turn on the eSIM line and data roaming. Pick your phone below for a screenshot of every step.

How does eSIM installation work?
01
Get your eSIM
Right after checkout, your eSIM QR code and installation details are sent to your email.
02
Install on travel day
Connect to Wi-Fi and add the eSIM in Settings. Leave the line switched off until you arrive.
03
Turn it on when you land
Switch on the eSIM line, use it for mobile data and turn on data roaming. Most plans start counting days now. Japan Docomo and a few others already started when you scanned the QR.
04
Switch back after your trip
Set mobile data back to your primary SIM. You can delete the eSIM once the plan has ended.
Before you start: 6-point checklist
Your phone supports eSIM and is unlocked
Dial *#06# — if an EID number appears, your phone supports eSIM. A phone locked to your carrier can't use another provider's eSIM.
A stable Wi-Fi connection
The eSIM downloads over the internet. Stay connected until installation is finished.
The QR code on a second screen
You can't scan a QR code shown on the same phone. Print it or open the email on a laptop or tablet — or use the app or manual method instead.
Install on the day you travel
The eSIM has a limited number of days, so don't install and activate it too early. The best time is the day you fly — at home or at the airport.
Don't delete the eSIM
Many eSIMs can't be reinstalled once removed. Keep it on your phone until your trip and plan are over — see the Reinstall row on your plan page.
Keep roaming off on your primary SIM
Your home carrier may charge roaming fees if its line is used abroad. Only the Maaltalk eSIM should have data roaming on.
Most plans start when you turn on data roaming
For most Maaltalk eSIMs, days start when you turn on data roaming for the eSIM line — do that after you arrive. Japan Docomo and a few other plans start the moment you scan the QR code; install those on the day you need them. Check the plan page if unsure.
Mind the time zone
Except for a few special eSIMs, most Maaltalk eSIMs count each day in Hong Kong time (UTC+8). Example: activate a 1-day eSIM at 1:00 pm in London and it's already 9:00 pm in Hong Kong — the day ends after only 3 hours. Check the Validity row on your plan page.
Choose your phone
Screens may look slightly different depending on your OS version and language, but the menu names are the same.
Most iPhone XR, XS and newer models support eSIM. Choose the easiest method for you — all three end in the same place.
Method 1
One tap in the MaaltalkNow appEasiest · no QR
On iOS 16.4.1 or later, the MaaltalkNow app installs your eSIM directly — no QR scanning and no second screen needed.
- 1
Step 1
Download the MaaltalkNow app
Get it free from the App Store and sign in.

- 2
Step 2
Open the eSIM Installation menu
Tap eSIM Installation in the app.
- 3
Step 3
Enter your order email
Type the email address you used at checkout and tap Send.
- 4
Step 4
Enter the verification code
Type the code from your email. Verify stays grey until the code is in.
- 5
Step 5
Tap Verify
When the code is complete the button turns orange — tap Verify.
- 6
Step 6
Tap Install Now
On the eSIM details screen, tap Install Now.
- 7
Step 7
Tap Allow
Your iPhone opens the Cellular screen. Tap Allow to add the eSIM.
- 8
Step 8
Tap Continue, then Done
Wait a few seconds while the eSIM is added, then tap Done.
- 9
Step 9
Default voice line: Primary
Keep your primary line for calls and SMS.
- 10
Step 10
iMessage & FaceTime: Primary
Your number stays the same for iMessage and FaceTime.
- 11
Step 11
Cellular Data: your eSIM
Pick the new eSIM for mobile data. Its label may read Travel, Business or Secondary. Installation is done!
Method 2
Scan the QR code
Use the QR code from your order email, shown on another screen or printed.
- 1
Step 1
Settings > Cellular > Add eSIM
On some iOS versions it's called Add Cellular Plan, or Mobile Service in some regions.
- 2
Step 2
Choose Use QR Code and scan
Point the camera at the QR code. If it won't scan, use the manual method below.
- 3
Step 3
Label the eSIM
Pick a label such as Travel so you can tell your lines apart.
- 4
Step 4
Set your default lines
Default line and iMessage/FaceTime: Primary. Cellular Data: your travel eSIM. Installation is done!
Method 3
Enter the details manually
Can't scan? Type in the SM-DP+ address and activation code from your eSIM email.
- 1
Step 1
Settings > Cellular > Add eSIM > Use QR Code
- 2
Step 2
Tap Enter Details Manually
The link is at the bottom of the camera screen.
- 3
Step 3
Enter the SM-DP+ address and activation code
Copy them exactly as shown in your email, then tap Next.
- 4
Step 4
Label the eSIM and set default lines
Same as steps 3 and 4 of the QR method.
iPhone
Turn on your eSIM when you arrive
- 1
Step 1
Settings > Cellular > choose the eSIM > Turn On This Line
- 2
Step 2
Turn on Data Roaming
On the same eSIM screen, switch Data Roaming on. Most plans start now; Japan Docomo and similar plans already started at QR scan.
- 3
Step 3
Turn off Allow Cellular Data Switching
Under Cellular Data, switch this off so your iPhone never falls back to your home carrier's data.
How do I know it's working?
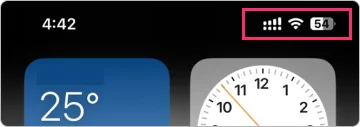
Look at the status bar in the top-right corner: you'll see signal bars and an LTE/5G icon for the eSIM. Turn off Wi-Fi and open a web page to confirm.
How many eSIMs can an iPhone hold?
You can install 8 or more eSIMs on an iPhone, but only 2 can be used at the same time.
Most recent Galaxy S, Z Fold and Z Flip models support eSIM. Menu names below follow One UI; older versions say SIM card manager.
Method 1
One tap in the MaaltalkNow appEasiest · no QR
On recent Galaxy phones, the MaaltalkNow app installs your eSIM directly — no QR scanning and no second screen needed.
- 1
Step 1
Download the MaaltalkNow app
Get it free from Google Play and sign in.

- 2
Step 2
Open the eSIM Installation menu
Tap eSIM Installation in the app.
- 3
Step 3
Enter your order email
Type the email address you used at checkout and tap Send.
- 4
Step 4
Verify, then tap Install Now
Enter the verification code from your email, then tap Install Now on the eSIM screen.
- 5
Step 5
Tap Setup on the system dialog
Android asks to set up your eSIM. Tap Setup.
- 6
Step 6
Tap Add when asked to add the eSIM
Wait while it checks SIM information, then tap Add.
- 7
Step 7
Wait while the eSIM is added
Keep the screen open until the download finishes.
- 8
Step 8
Name the eSIM if you want
You can rename it later in Settings > Connections > SIM manager.
- 9
Step 9
Calls and messages: keep SIM 1
Leave outgoing calls and texts on your primary SIM.
- 10
Step 10
Mobile data: your new eSIM
Choose the new eSIM for mobile data, then check SIM manager. Installation is done!
Method 2
Scan the QR code
Use the QR code from your order email, shown on another screen or printed.
- 1
Step 1
Open Settings > Connections
- 2
Step 2
Tap SIM manager
Called SIM card manager on older One UI versions.
- 3
Step 3
Tap Add eSIM (Add mobile plan)
- 4
Step 4
Choose Add using QR code
- 5
Step 5
Scan the QR code
Your camera opens automatically. If scanning fails, use the code method below.
- 6
Step 6
Confirm the new plan
Your plan is downloaded to the eSIM. When it appears in SIM manager, installation is done!
Method 3
Paste the code from the MaaltalkNow app
On Android, the MaaltalkNow app copies your eSIM's activation code (LPA) so you can paste it instead of scanning.
- 1
Step 1
Copy the code in MaaltalkNow
Open eSIM Installation, enter your order email and tap your eSIM to copy its LPA code.
- 2
Step 2
Settings > Connections > SIM manager > Add eSIM
- 3
Step 3
Tap Enter activation code and paste
Paste the code (it starts with LPA:1$), tap Connect and follow the prompts.
Samsung Galaxy
Turn on your eSIM when you arrive
- 1
Step 1
Settings > Connections > SIM manager
- 2
Step 2
Turn on the eSIM
Switch the eSIM on under SIM cards / Mobile network.
- 3
Step 3
Turn on mobile data for the eSIM
Choose the eSIM for Mobile data under Preferred SIM card, then check Settings > Connections > Data usage.
- 4
Step 4
Turn on Data roaming
Back in Connections, tap Mobile networks and switch Data roaming on.
How do I know it's working?
Swipe down: the status bar shows the eSIM's signal and an LTE/5G icon. Turn off Wi-Fi and open a web page to confirm.
How many eSIMs can a Galaxy hold?
Most Galaxy phones store several eSIM profiles but use one eSIM at a time, next to a physical SIM. Galaxy Z Fold4 and Z Flip4 use one physical SIM and one eSIM at once. The Galaxy S21 Ultra can't use two eSIMs at the same time.
Pixel 3a and newer support eSIM. Menu names may vary slightly between Android versions.
Method 1
Scan the QR code
Use the QR code from your order email, shown on another screen or printed.
- 1
Step 1
Open Settings > Network & internet
- 2
Step 2
Tap + next to SIMs
Then choose Download a SIM instead (or Don't have a SIM card?).
- 3
Step 3
Use 2 SIMs? Tap Yes
Then tap Next to download your SIM.
- 4
Step 4
Scan the QR code
Once recognised, the eSIM downloads automatically. Installation is done!
Method 2
Enter the code manually
Can't scan? Paste the activation code from your eSIM email or the MaaltalkNow app.
- 1
Step 1
Settings > Network & internet > + next to SIMs > Download a SIM instead
- 2
Step 2
On the scan screen, tap Need help? > Enter it manually
- 3
Step 3
Paste the activation code
Enter the full code (it starts with LPA:1$) and tap Continue.
Google Pixel
Turn on your eSIM when you arrive
- 1
Step 1
Turn on the eSIM
Settings > Network & internet > SIMs: select the eSIM and toggle Use SIM on.
- 2
Step 2
Turn on Mobile data and Roaming
Roaming must be ON for the Maaltalk eSIM but OFF for your primary SIM to avoid roaming charges from your home carrier.
How do I know it's working?
The status bar shows the eSIM's signal and an LTE/5G icon. Turn off Wi-Fi and open a web page to confirm.
How many eSIMs can a Pixel use?
Using two SIMs at once works on Pixel 3a and newer, except Pixel 3a phones bought in Japan. Pixel 4a (5G) and newer can connect to 5G in dual-SIM mode.
Only some Huawei models support eSIM, and a Huawei phone can hold one eSIM.
Method 1
Scan the QR code
Use the QR code from your order email, shown on another screen or printed.
- 1
Step 1
Open Settings > Mobile network
- 2
Step 2
Tap SIM management
- 3
Step 3
Tap > next to SIM 2
- 4
Step 4
Scan the QR code
Follow the on-screen instructions to finish installing the eSIM.
Method 2
Use a saved QR image
No second screen? Save the QR code as an image first.
- 1
Step 1
Save the QR code to your Gallery
Take a screenshot of the QR code from your email.
- 2
Step 2
On the scan screen, tap Select from Gallery
Pick the saved image to start the installation.
Method 3
Enter the activation code
Type in the code from your eSIM email instead of scanning.
- 1
Step 1
On the scan screen, tap Enter manually
- 2
Step 2
Enter the activation code
Follow the on-screen instructions to finish.
Huawei
Turn on your eSIM when you arrive
- 1
Step 1
Turn on the eSIM line
Settings > Mobile network > SIM management: enable the eSIM and set it as the default for mobile data.
- 2
Step 2
Turn on Data roaming
Settings > Mobile network > Mobile data: switch Data roaming on.
How do I know it's working?
The status bar shows the eSIM's signal and an LTE/5G icon. Turn off Wi-Fi and open a web page to confirm.
How many eSIMs can a Huawei hold?
Huawei phones can have only one eSIM installed.
eSIM installed but not working? Quick fixes
Try these in order — most connection problems are solved in the first two steps.
No internet after landing
- Make sure the eSIM line is turned on and selected for mobile data.
- Turn on Data Roaming for the eSIM.
- Turn Airplane mode on for 10 seconds, then off — or restart your phone.
- If your plan page lists an APN, enter it in the eSIM's mobile network settings.
The signal shows No service or SOS
- Turn off automatic network selection and pick a partner network from the list (see Network on your plan page).
- Move to an open area and restart your phone.
The QR code won't scan
- Show the QR code on another screen at full brightness, or print it.
- Use the manual method with the SM-DP+ address and activation code.
- On iPhone, install in one tap with the MaaltalkNow app.
Unable to add eSIM / installation failed
- Check your Wi-Fi connection and try once more.
- Make sure your phone is carrier-unlocked.
- Don't keep retrying the same QR code — contact us first, because many codes work only once.
I deleted my eSIM by mistake
- Contact support right away with your order email. Whether it can be reissued depends on your plan's Reinstall rule.
Data is slow
- Daily plans can slow down after the daily high-speed allowance — see After data cap on your plan page.
- Toggle Airplane mode, or select another partner network manually.
Tips from our support team
01
Name it Travel
Label the eSIM Travel or Maaltalk so you always know which line is using data.
02
Keep your number
Leave your primary line as the default for calls. WhatsApp and iMessage keep working over the eSIM's data.
03
Need more data
In-place top-up of an existing eSIM is not offered. Buy a new eSIM and install the new QR code.
Buy a new eSIM
eSIM installation FAQ
When should I install my eSIM?
On the day you travel, while you're on Wi-Fi — at home or at the airport. Leave the eSIM line off and turn on data roaming only after you land, because that's when most plans start counting days. Japan Docomo and a few others start when you scan the QR — install those on the day you need them.
Do I need Wi-Fi to install an eSIM?
Yes. Your phone needs an internet connection (Wi-Fi or mobile data) to download the eSIM. Using it abroad doesn't need Wi-Fi.
Will I keep my phone number?
Yes. Your primary SIM stays in your phone for calls and SMS while the Maaltalk eSIM handles data. Calls and texts on your primary line may be charged by your home carrier.
Can I reuse the QR code or reinstall the eSIM?
Usually not — most QR codes work only once, and many eSIMs can't be reinstalled after deletion. Check the Reinstall row on your plan page and keep the eSIM until your trip ends.
How many eSIMs can my phone hold?
iPhone: 8 or more stored, 2 in use at the same time. Galaxy and Pixel: several stored, usually one eSIM in use next to a physical SIM. Huawei: one eSIM.
Which phones support eSIM?
Most iPhone XR/XS and newer, recent Galaxy S, Z Fold and Z Flip models, Pixel 3a and newer, and some Huawei models. Dial *#06# — if you see an EID, your phone supports eSIM. It must also be carrier-unlocked.
Still stuck? We're here to help
Chat with Maaltalk support or email us with your order email and a screenshot of the problem — we'll walk you through it.


